Using Node-RED with ControlCom Connect
Node-RED provides a powerful, visual way to connect your devices to the ControlCom Connect platform. This guide will walk you through setting up Node-RED and creating flows that send data to and receive commands from ControlCom Connect.
Introduction
Node-RED has become one of the most popular tools for IoT application development due to its intuitive flow-based programming interface. When combined with the ControlCom Connect platform, it creates a powerful solution for industrial monitoring, control, and data analysis. This guide will walk you through the process of connecting Node-RED to the ControlCom Connect platform, enabling you to build sophisticated IoT applications with minimal coding.
What is Node-RED?
Before diving into the integration process, let's briefly review what Node-RED is and why it's valuable for IoT applications:
Node-RED is an open-source, browser-based flow editor that makes it easy to wire together hardware devices, APIs, and online services. Developed by IBM, it provides a visual programming approach that allows developers and non-developers alike to connect devices and services using a simple drag-and-drop interface.
Prerequisites
Before you begin the integration process, ensure you have the following:
- Node-RED installed on your system or edge device (version 2.0.0 or higher recommended)
- If you haven't installed Node-RED yet, you can follow the official installation guide.
- A ControlCom Connect account with appropriate access permissions
Configuration
Before connecting Node-RED to ControlCom Connect, you need to create a device in the ControlCom platform:
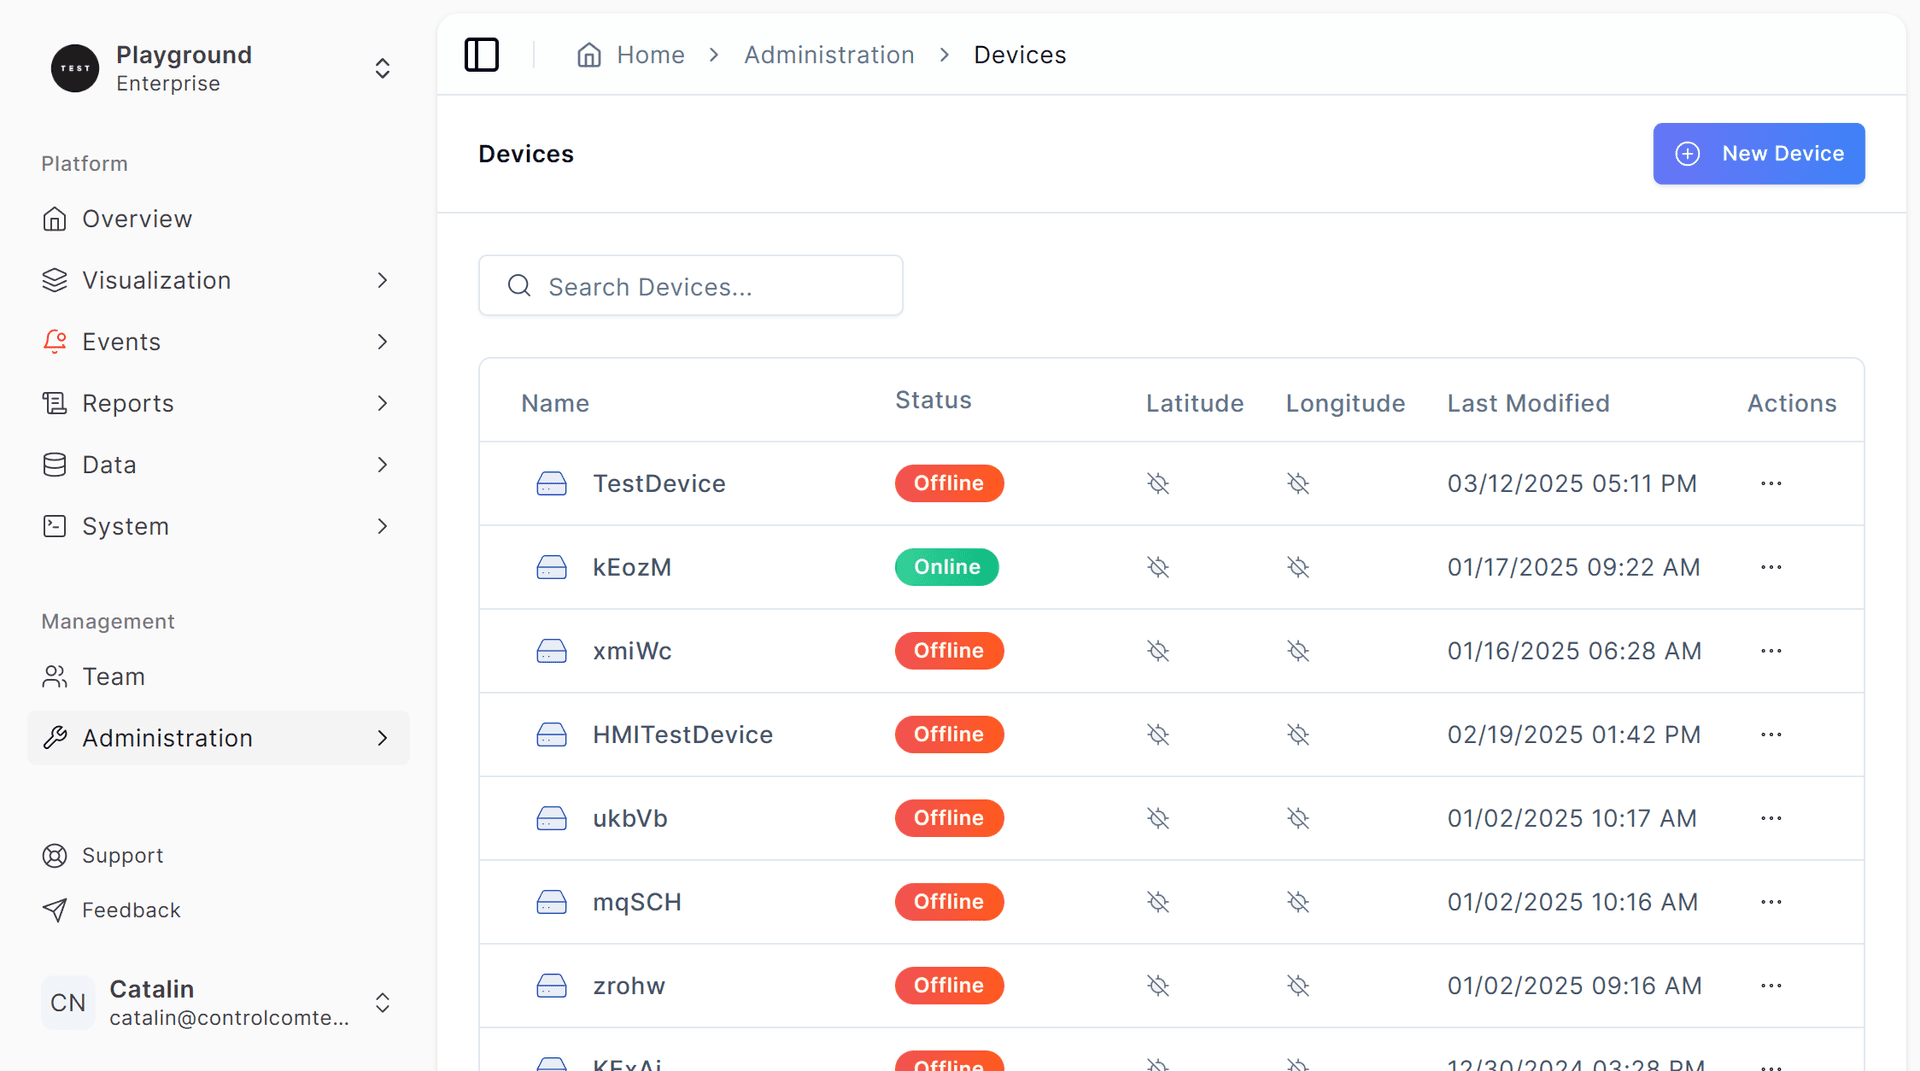
- Go to the ControlCom platform at https://console.controlcomtech.com/
- Log into your organization
- Navigate to Administration > Devices
- Click [New Device]
- Select Generic Device
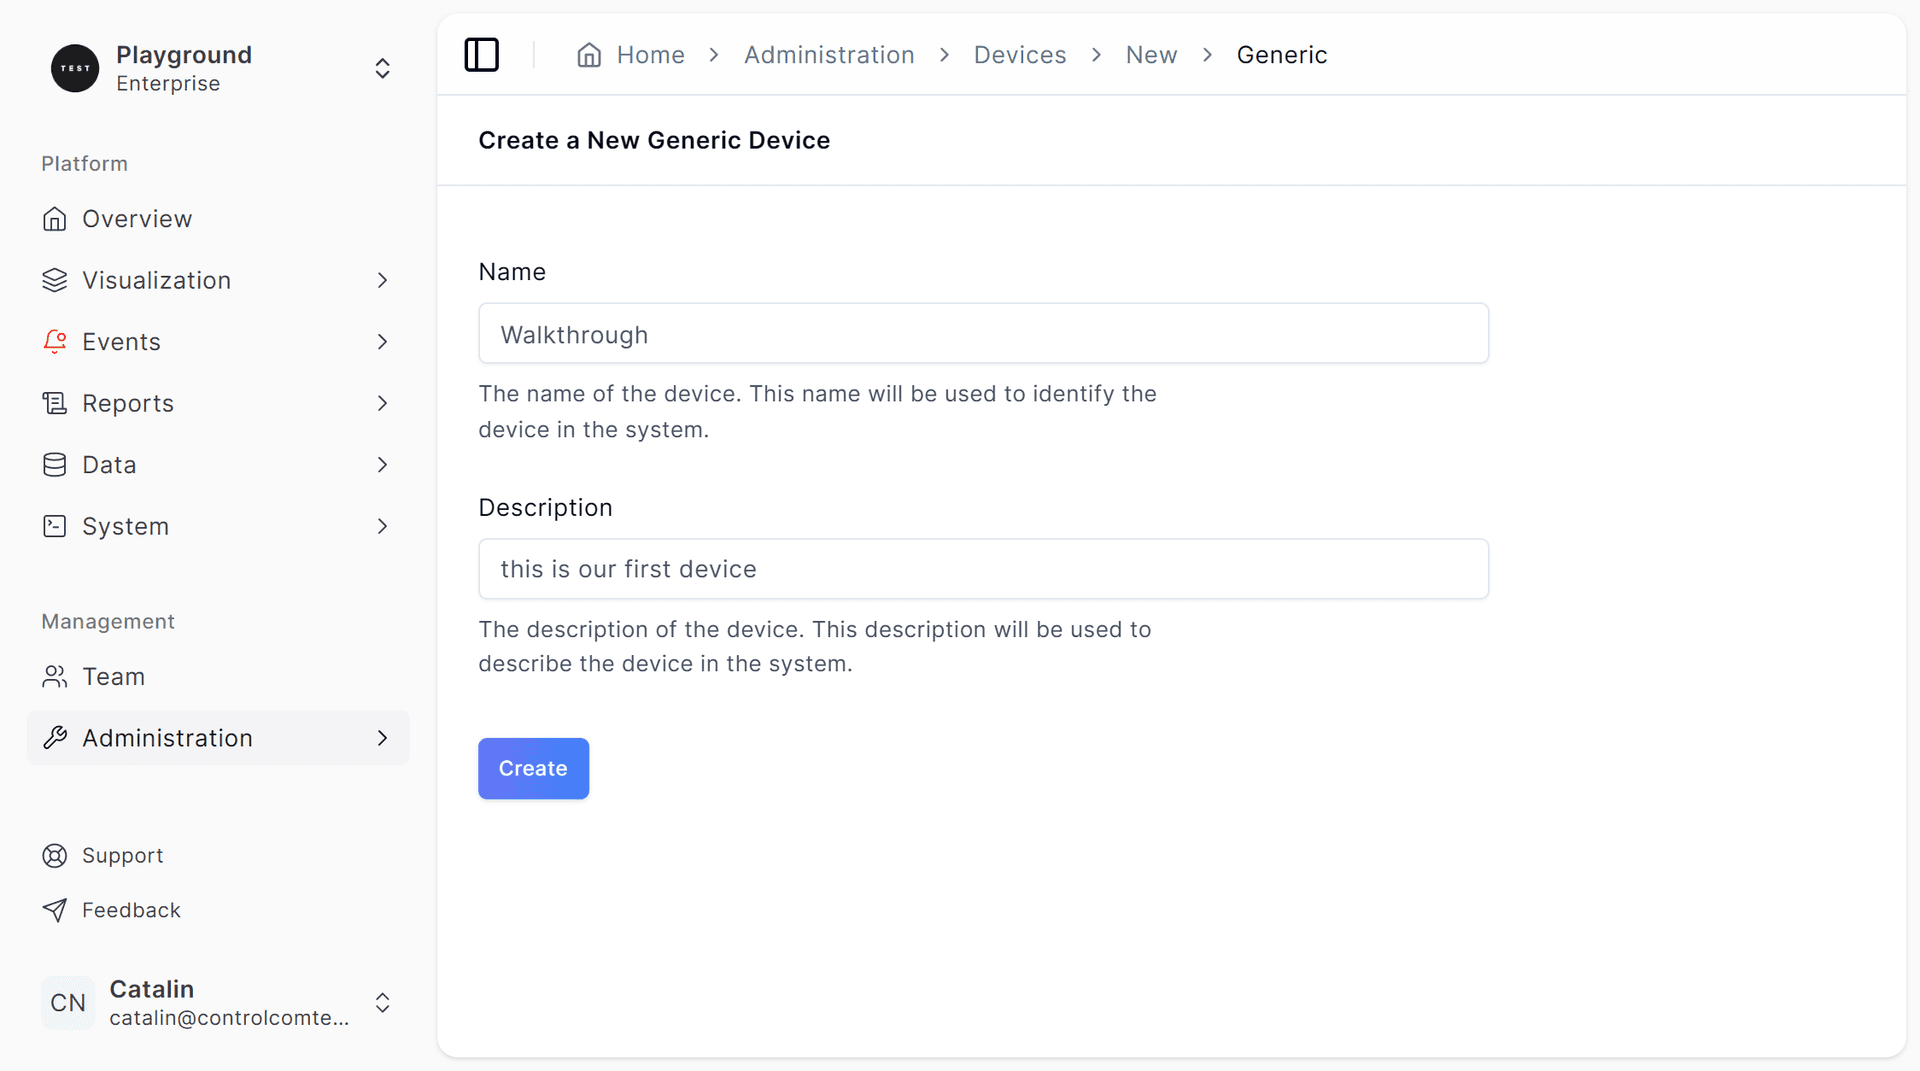
- Give your device a name and a description
- Click Create
Creating Variables
After creating your device, you'll need to create variables to store the data that will be sent from your Node-RED flow:
- Navigate to the Variables section for your newly created device
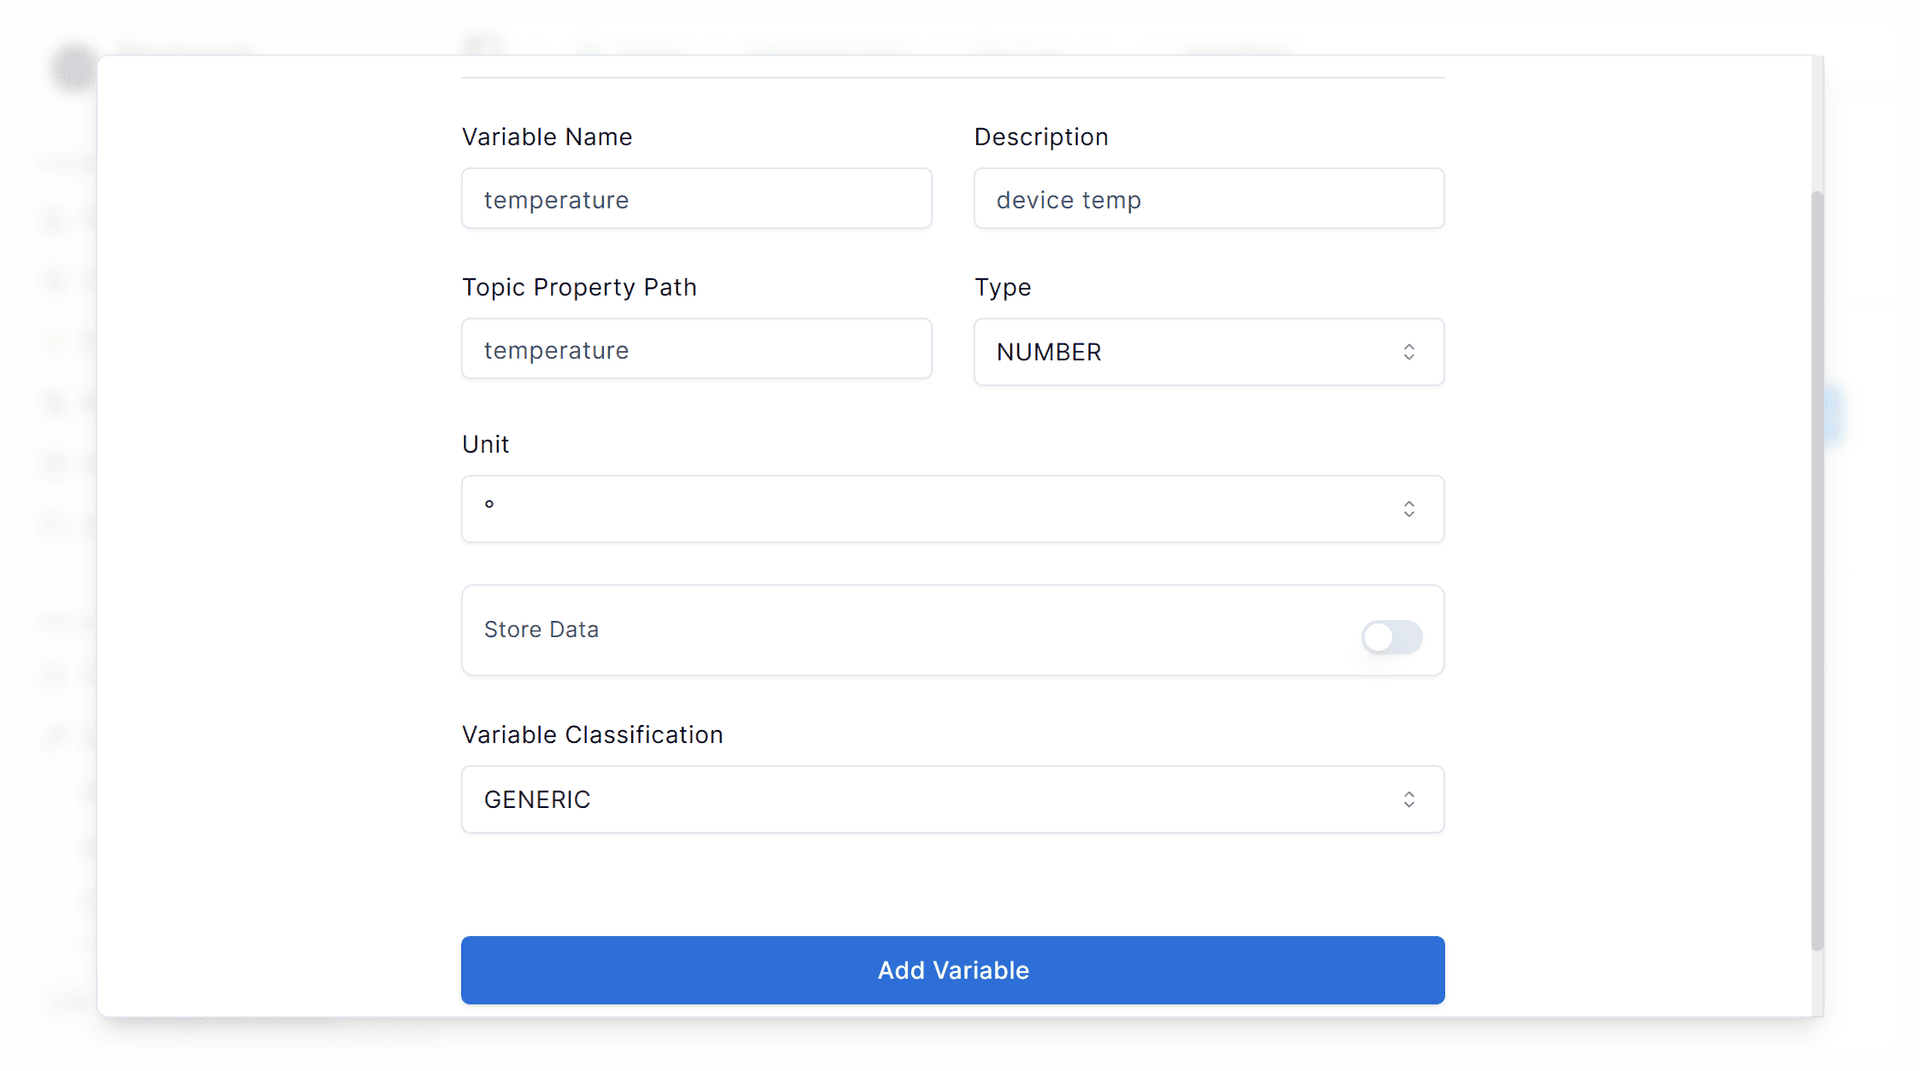
- Click Add Variable
- Enter the following information:
- Variable Name: temperature
- Description: Temperature readings from the device
- Topic Property Path: temperature (this should match the variable name in your MQTT payload)
- Type: Number
- Unit: °
- Click Add Variable to save
This variable will store the temperature data sent from your Node-RED flow to the ControlCom Connect platform.
Downloading Certificates
After creating your device, you'll need to download and save the security certificates:
- Save the device certificate, public key, private key, and Amazon Root CA 1 2048
- Check the box that says "I agree that I've downloaded the files above"
- Click Continue
These certificates will be used to establish a secure connection between your Node-RED instance and the ControlCom platform.

Connection Details
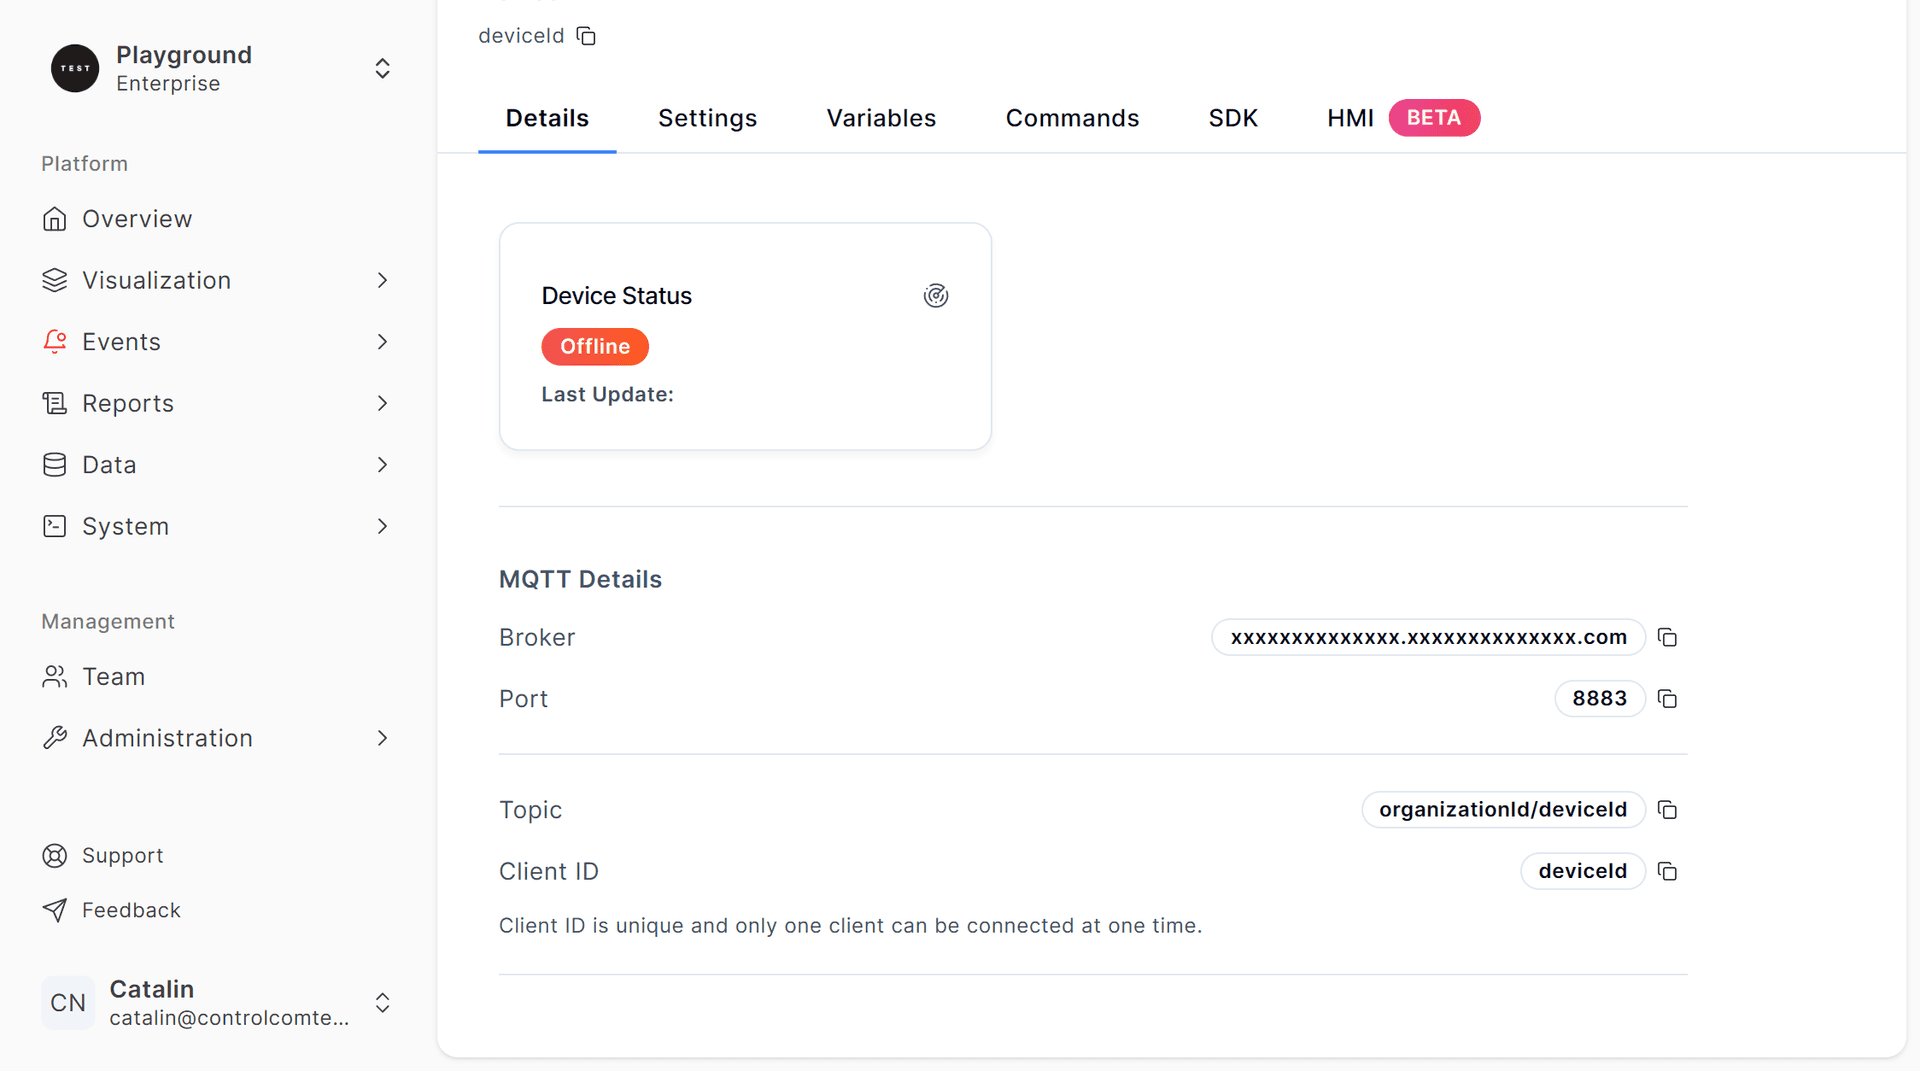
After downloading the certificates, you'll be shown the MQTT connection details.
Copy and store this information somewhere safe as you'll need it to connect to the platform. The connection details include:
- Endpoint: The MQTT broker endpoint URL
- Client ID: Your device's unique identifier
- Topic: The MQTT topic to publish and subscribe to
Example Flows
Now that you have your device configured in ControlCom Connect and have saved your connection details and certificates, let's create a Node-RED flow to connect to the platform:
Configuring MQTT Connection
- Open your Node-RED editor and create a new flow
- From the palette on the left, drag an MQTT out node onto the canvas
- Double-click the node to edit its properties
- Click the pencil icon (edit) next to the Server field to add a new MQTT broker
- In the MQTT broker configuration:
- Server: Enter the broker address from your connection details
- Port: Enter the port number (typically 8883 for secure MQTT)
- Check the "Use TLS" box
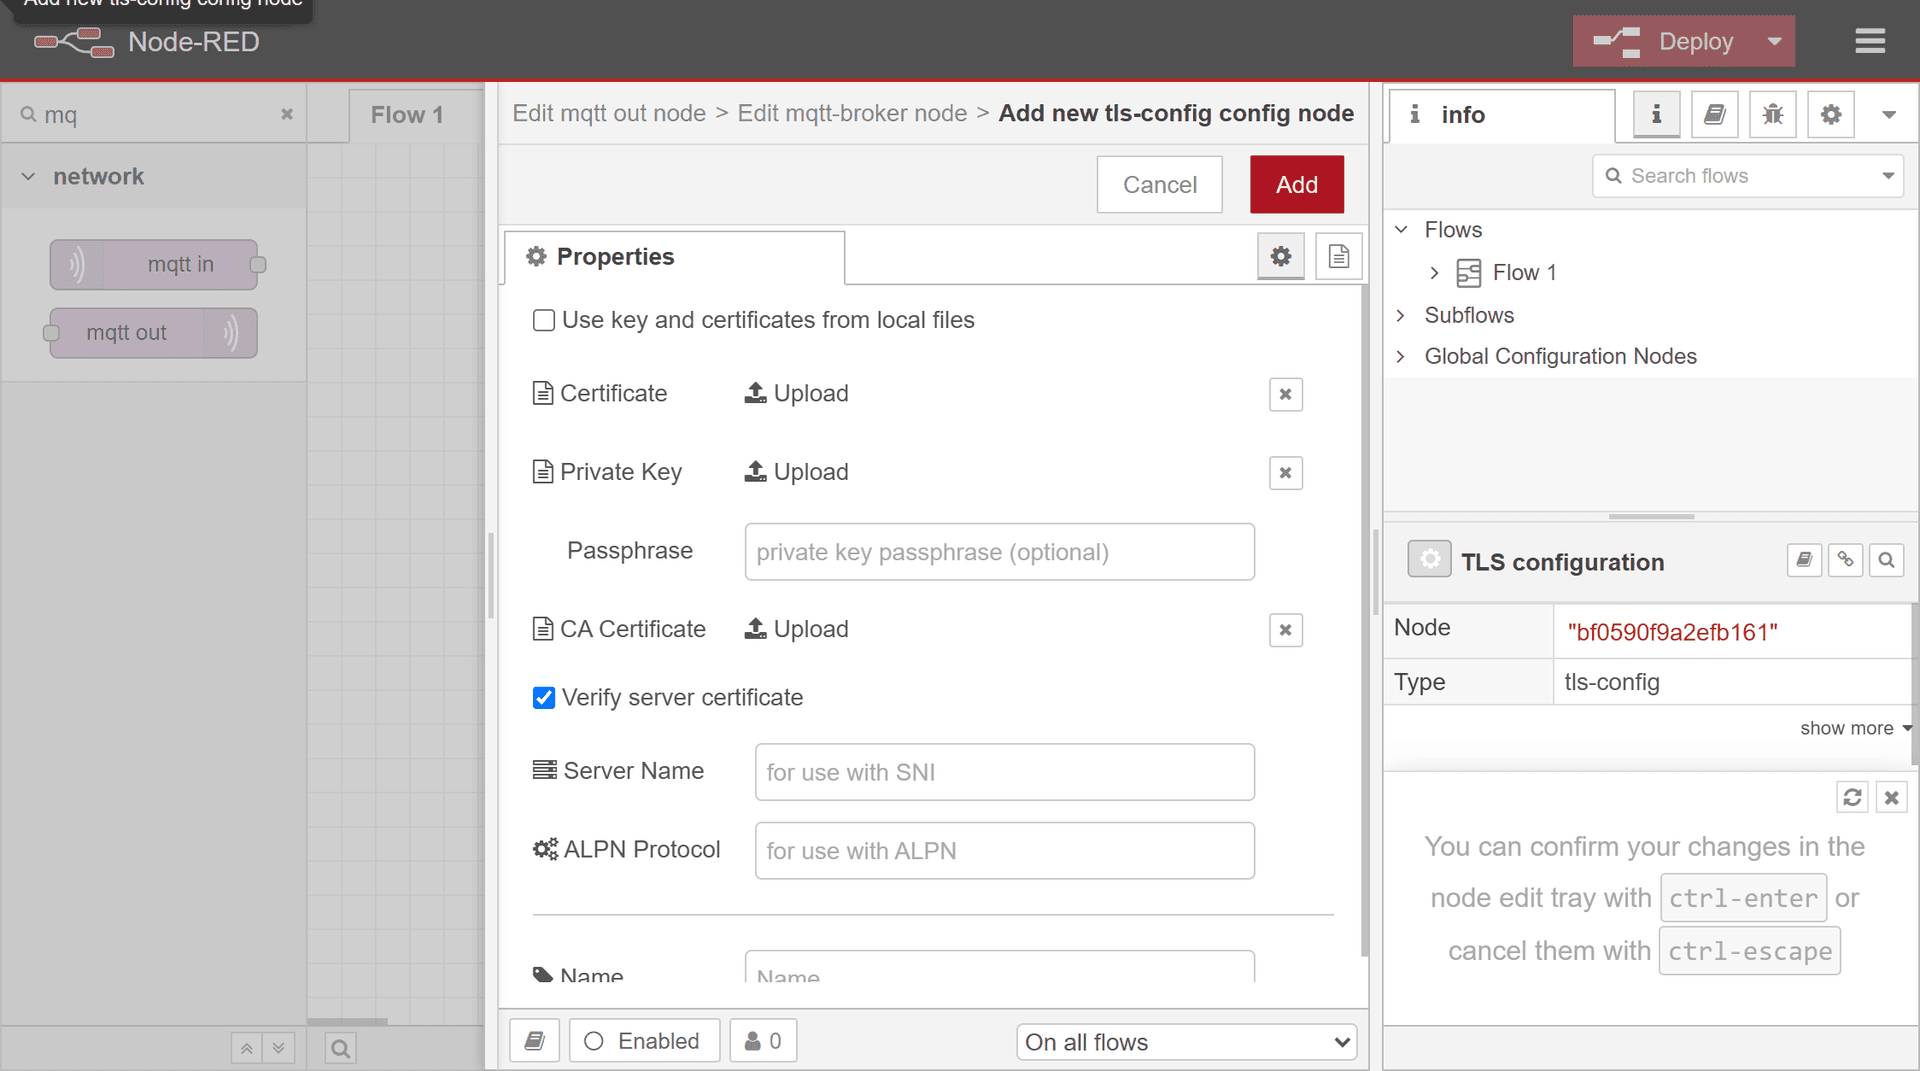
- Click the pencil icon next to the TLS Configuration to set up a new TLS config
- In the TLS Configuration:
- Upload the device certificate (ending in certificate.pem.crt)
- Upload the private key (ending in private.pem.key)
- Upload the CA certificate (AmazonRootCA1.pem)
- Click "Add" to save the TLS configuration
- Back in the MQTT broker configuration:
- Set the Client ID to the one provided in your connection details
- Check the "Use clean session" box
- Click "Add" to save the broker configuration
- In the MQTT out node configuration:
- Set the Topic to the one provided in your connection details
- Click "Done" to save the node configuration


Creating a Test Flow
Now let's create a simple flow to send temperature data to the ControlCom Connect platform:
- Drag an Inject node from the palette and connect it to your MQTT out node
- Double-click the Inject node to edit its properties
- Delete the
.topicproperty as we're already specifying it in the MQTT node configuration - Set the payload type to JSON
- Enter the following JSON payload:
{
    "dataArray": [
        {
            "key": "temperature",
            "value": 24.5
        }
    ]
}
- Click Done to save the node configuration
- Click Deploy to deploy your flow
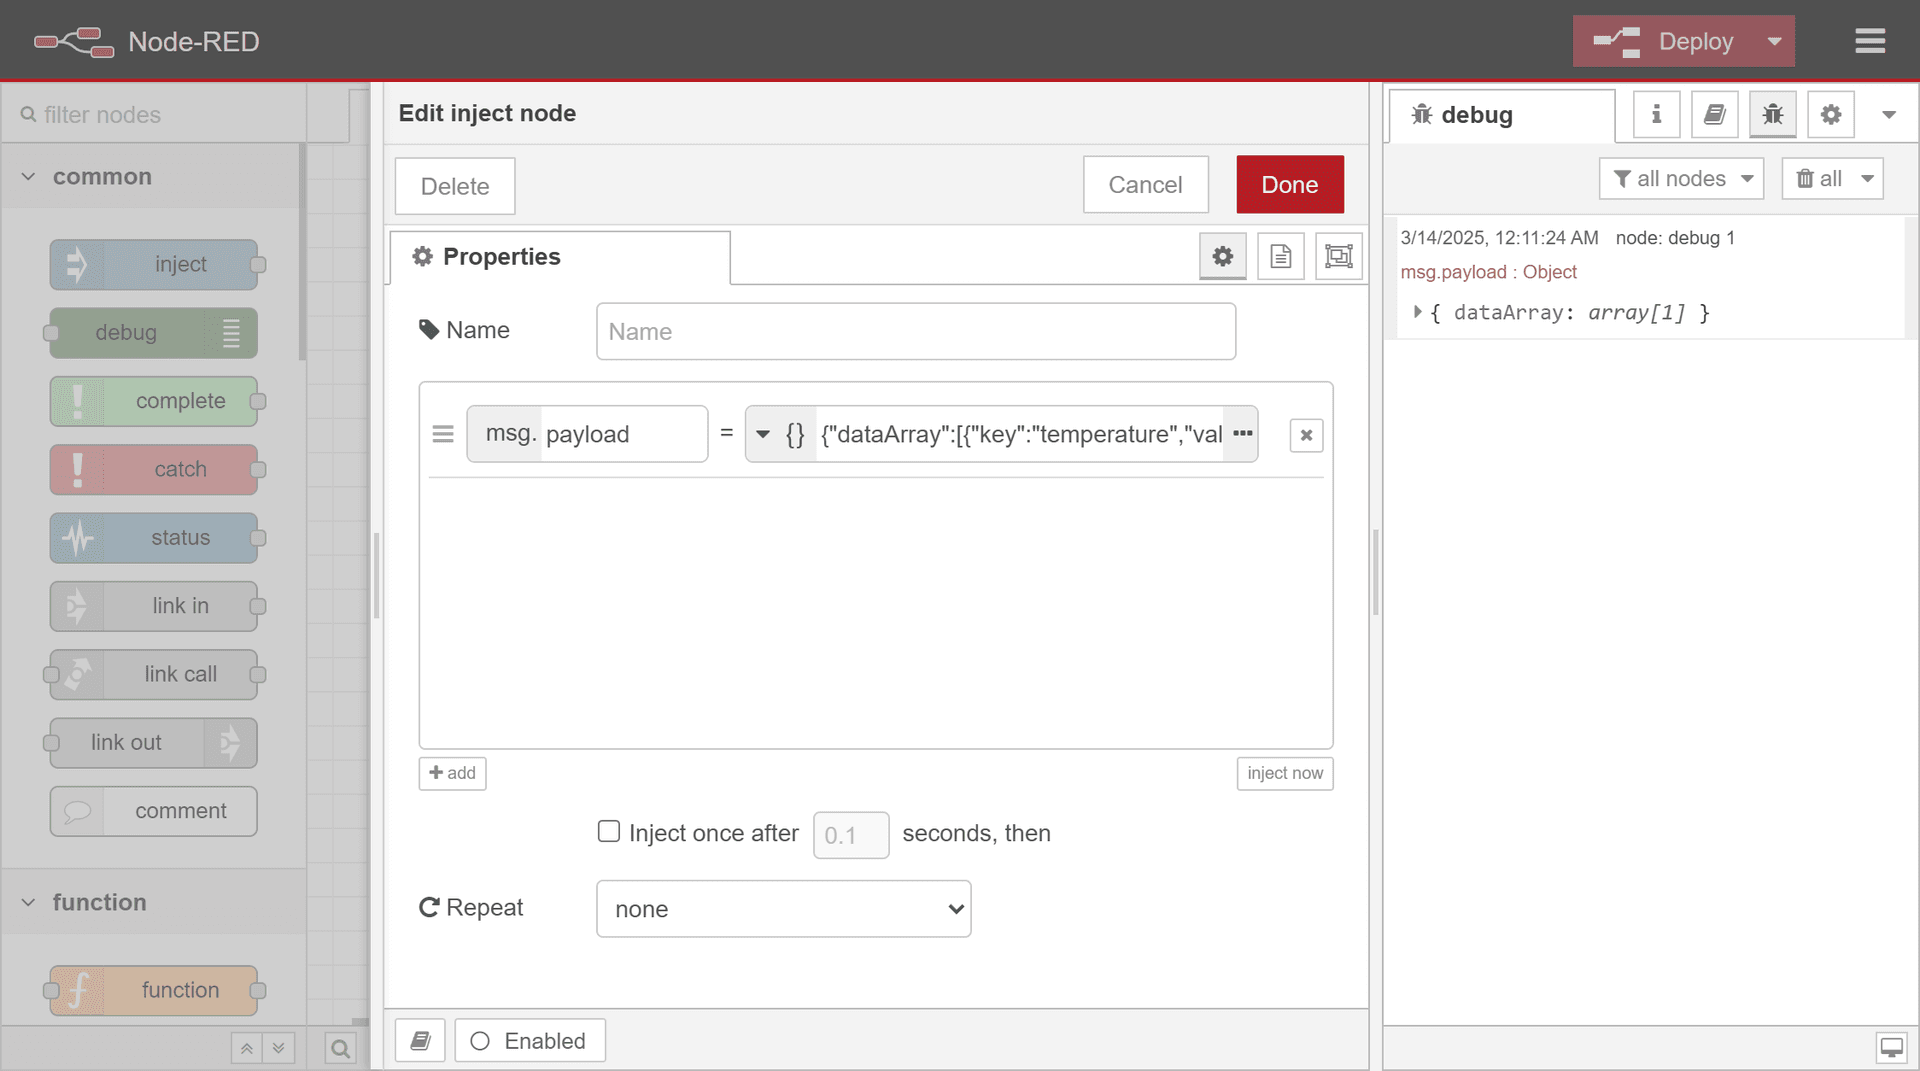
This flow will send a temperature value of 24.5 to the ControlCom Connect platform when you click the inject button. The data will be stored in the temperature variable you created earlier.
To trigger the data send, you need to manually click the small button on the left side of the inject node. This will send the configured JSON payload through the MQTT out node to the ControlCom Connect platform.
For more information on payload formats and data transmission, see the Sending Data documentation.
Once configured, your Node-RED flow will be able to securely connect to the ControlCom Connect platform and send data.
Best Practices
This section will be developed soon with best practices for using Node-RED with ControlCom Connect.