Reading EtherNet/IP Data with ControlCom Edge Server
The ControlCom Connect platform allows fully configuring a onboarded device Edge Server configuration to read EtherNet/IP (CIP) data from Allen-Bradley and Omron PLCs.
Prerequisites
- This guide requires the ControlCom Edge Server to be onboarded. See our Onboarding Guide for the Edge Server to get started.
- A variable must already exist on the device to receive EtherNet/IP values. See Creating a Variable — you'll need its Topic Property Path when configuring the EtherNet/IP tag.
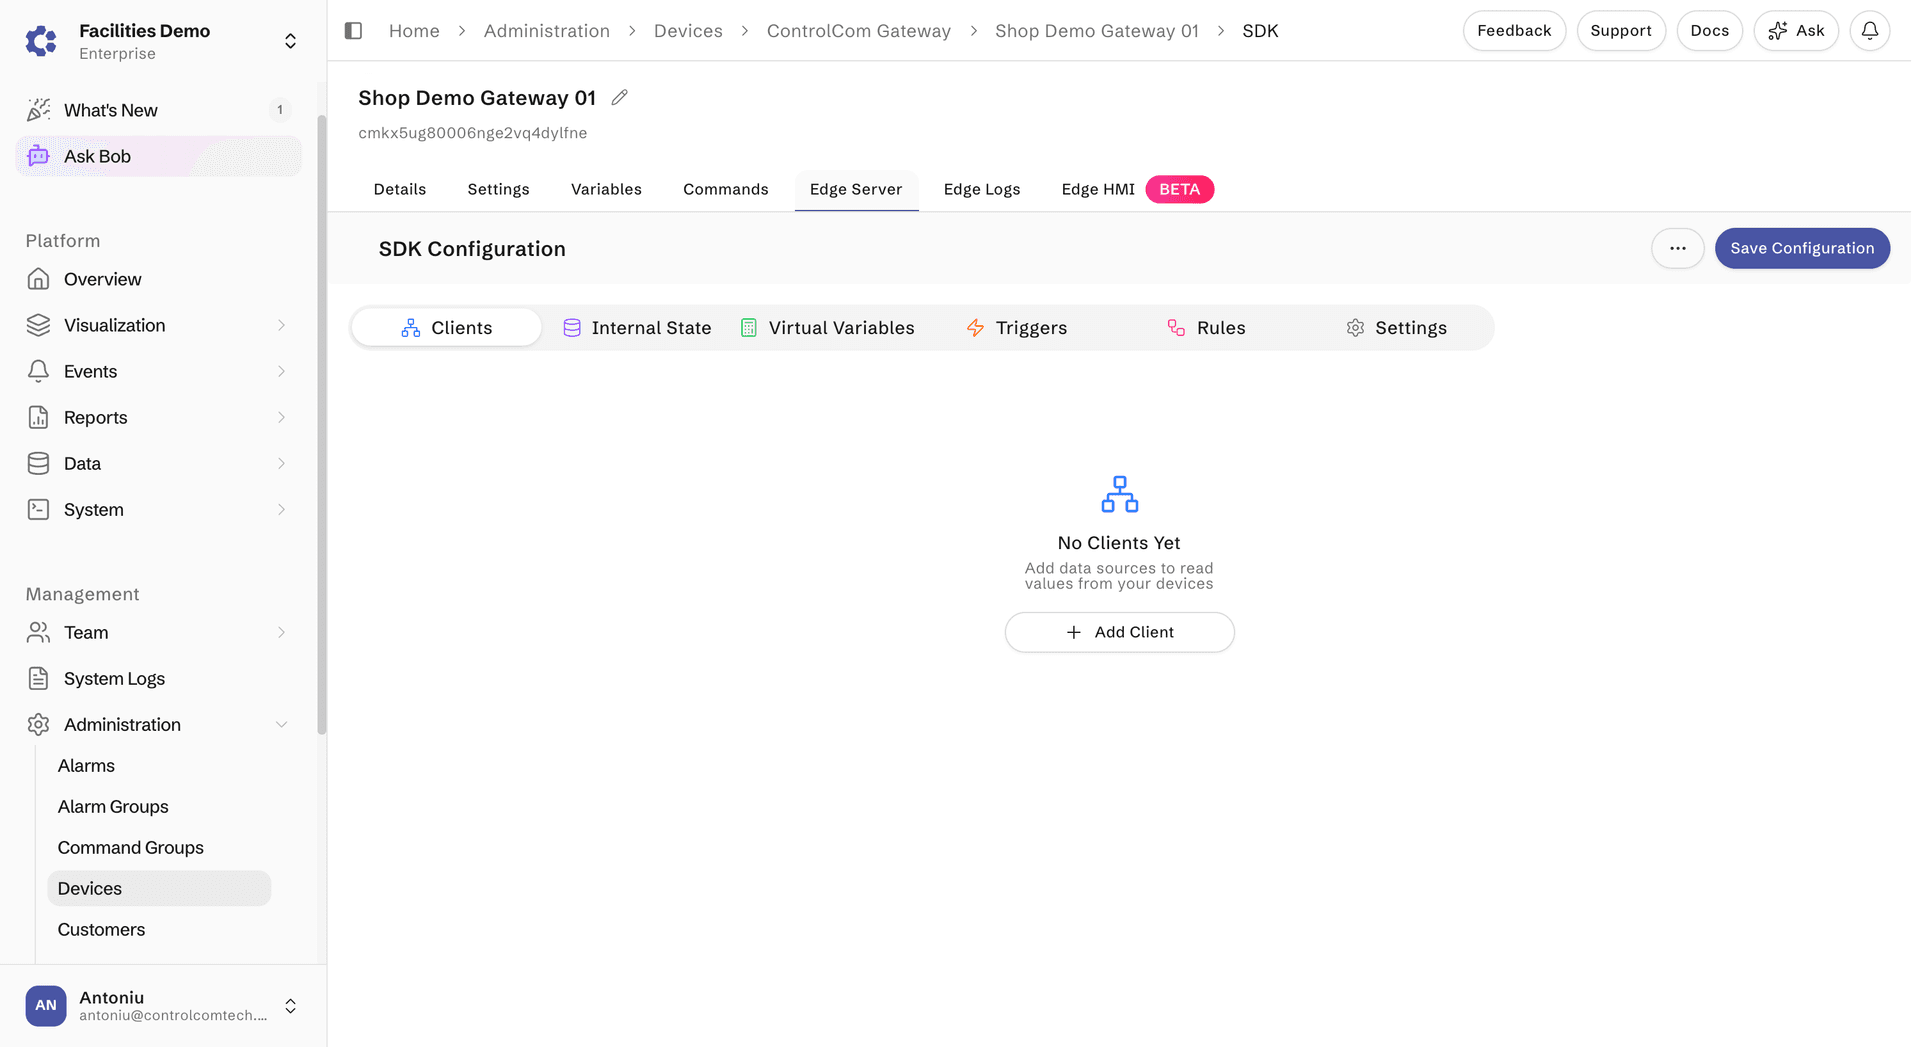
Creating an EtherNet/IP Client
To create a new EtherNet/IP client in ControlCom Connect for device:
- Navigate to Administration > Devices
- Select a onboarded device
- In the device page, click the Edge Server tab
- Click the "+ Add Client" and select Ethernet/IP
- A new subitem will appear called "Clients", select the newly added client.

Connection Sub Menu
- Enter in a friendly name for the EtherNet/IP Client Name
- Select the PLC Type. Supported families:
ControlLogixCompactLogixMicroLogixMicro800Micro850PLC-5SLC 500Omron
- Enter the IP Address of the PLC, such as
192.168.1.100 - Enter the Port (defaults to
44818, the EtherNet/IP standard) - Enter the Slot Number — the PLC backplane slot. Use
0for CompactLogix; for ControlLogix, set it to the slot number of the processor module. - Set the Poll Interval (ms) — how often the Edge Server polls each tag. Defaults to
1000. - Set the Timeout (seconds) — how long to wait for a CIP response before considering the request failed. Defaults to
15. - Enable the Enabled toggle to enable the client.
Settings Sub Menu
The Settings tab exposes maintenance actions for the client:
- Remove Client removes the EtherNet/IP client from this Edge Server configuration.
- Export Variables downloads the current tag list as a CSV (useful for bulk editing).
- Import Client Variables restores a tag list from a previously exported CSV.
Tags Sub Menu
- Click the "Add Tag" button
- Select the newly added entry in the tags list on the left
- Enter the Tag Path — the symbolic name of the tag in the PLC program, such as
Tank_1.TemperatureorMotor[3].Speed. UDT members and array elements are supported. - Select the Data Type that matches the PLC tag. Supported CIP types:
- Booleans:
BOOL - Signed integers:
SINT(8-bit),INT(16-bit),DINT(32-bit),LINT(64-bit) - Unsigned integers:
USINT,UINT,UDINT,ULINT - Floats:
REAL(32-bit),LREAL(64-bit) - Strings:
STRING - Bitwise:
BYTE,WORD,DWORD
- Booleans:
- Optionally set a Count to read a contiguous array of the chosen data type starting at the tag path.
- Select the Topic Property Path (the Variable created earlier in the guide). The tag's platform type (number, boolean, string) is determined automatically by the linked platform variable.
- On the Scaling tab, set the scale (defaults to 1), offset (defaults to 0), and decimals (defaults to 2). These apply only to
numbertags. - On the Misc tab:
- Send if Stale After (ms) — force a publish if the value has not changed in this many milliseconds. Defaults to
600000(10 minutes). - Deadband Percentage — only publish changes greater than this percent of the previous value. Defaults to
5. Only applies tonumbertags.
- Send if Stale After (ms) — force a publish if the value has not changed in this many milliseconds. Defaults to
You can use Sort by Tag Path to keep the tag list ordered alphabetically.
Saving
After configuring Connection and Tags, click the "Save Configuration" button and click "Save" in the confirmation popup.
Deployment
Once the Edge Server has been configured to read from an EtherNet/IP client, the changes can be deployed in a few ways. The Edge Server will pick up its changes on the next boot of the container.
Sending restart command from ControlCom Connect Platform
- Navigate to Administration > Devices
- Select the Device with the new EtherNet/IP configuration
- On the Details tab, click the restart button. This will stop the instance where it is currently running.
Stopping and starting the ControlCom Edge Server manually
This can be done by following the restart commands from the Onboarding Guide of the Edge Server
